


🎮 How I Created a Low Poly Coin for a Like/Dislike Voting System in Roblox
Today, I’ll show you how I made this sweet low-poly coin—well, it’s actually a thumbs up/thumbs down button—for my voting system inside Roblox.

You can use it in your own game experience, and I’ll guide you from Blender to Substance Painter and all the way into Roblox Studio. Let’s dive in.
🛠 Tools I Used
meshy.ai to generate the coin
Blender – for modeling the low-poly coin
Substance Painter – for baking and texturing
Optional: ZBrush (for organic mesh polishing)
Roblox Studio – to implement the asset and voting system
🌀 Step 1: Create the Low Poly Coin in Blender
Open Blender.
Press
Shift + A→ Mesh → Cylinder.Scale and rotate your mesh into a coin shape.
Enable Auto Smooth under Object Data Properties → Normals.
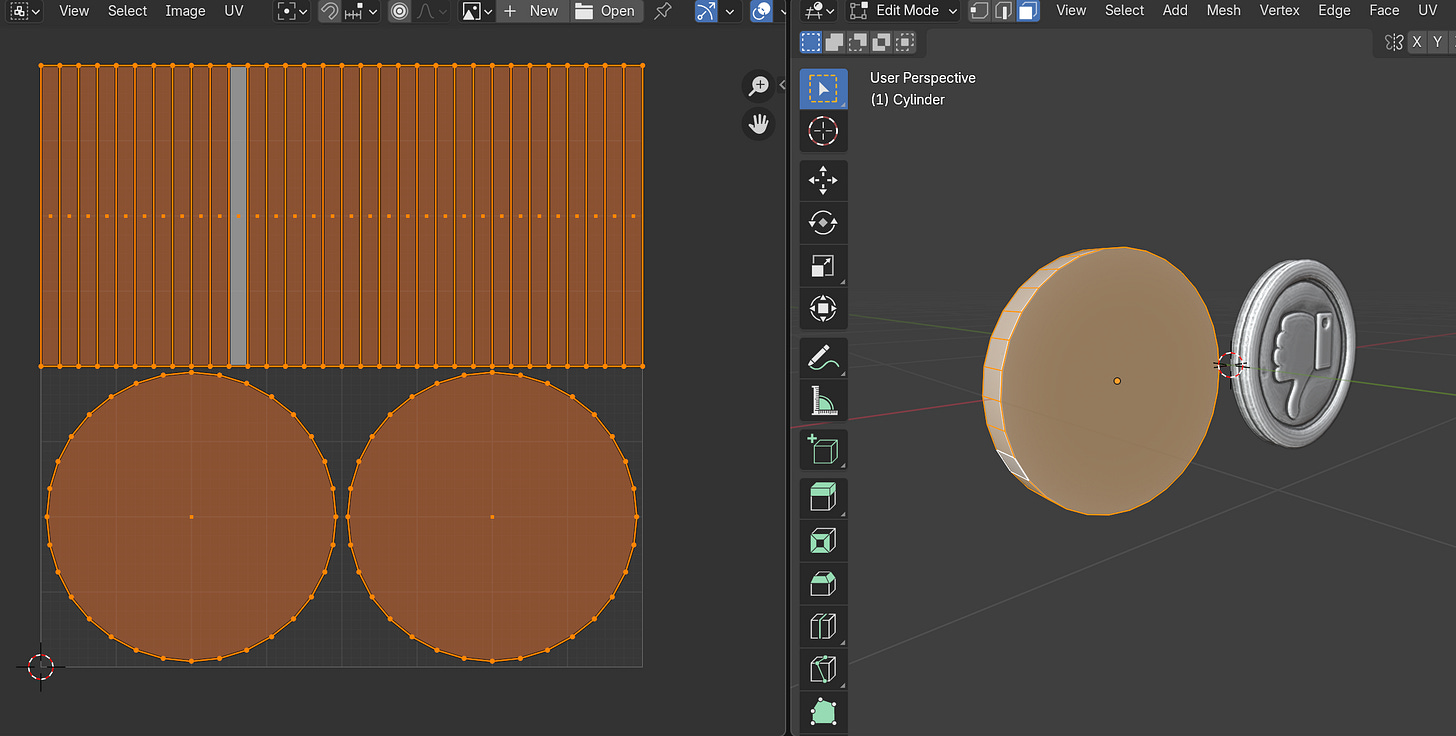

Try setting it to 80° for a nice edge smoothing.
That’s it! You’ve got your base mesh.
🧠 Pro Tip: Blender’s default cylinder has a clean UV layout. No unwrapping needed—huge time-saver!
🧱 Step 2: Generate a High Poly Version
You can use AI tools (like Meshy, Spark3D, etc.) to generate a high-res mesh or polish it further in ZBrush if desired. What matters is:
Keep the shape aligned with the low-poly base
Maintain detail, but don’t go crazy—you’re just baking this later
🔥 Step 3: Baking in Substance Painter
Export both models as
.fbx:Name one
coin_LP.fbx(low poly)Name one
coin_HP.fbx(high poly)Be sure to check "Selected Objects Only"
Open Substance Painter:
Start a new project → load the low poly
Set resolution (2K is fine)
Before baking:
Check that UVs look clean
Test a quick material drop—if it looks right, you’re golden

Now go to Bake Mesh Maps:
Load the high poly model
Set bake resolution to 4K for best results
Adjust frontal/rear distance until everything bakes cleanly
Click Bake
🎨 After baking, you can start texturing your coin however you want—metallic red for thumbs-down, green for thumbs-up, etc.
💾 Export Your Textures for Roblox
Use the Roblox surface appearance preset
Export texture maps as JPGs (2K)
Yes, Roblox compresses to 1K—but 2K gives better quality at the start
Import the mesh into Roblox Studio
Add a SurfaceAppearance and apply:
Color Map (Diffuse)
Normal Map (This one is super important!)
Roughness Map
💡 Without a normal map, your mesh will look flat. With it, boom—your detail shines through.
👍 Adding the Voting System
In my other tutorial (coming soon), I cover how to:
Integrate the thumbs-up/down system into my Roblox Voting Board
Ensure each player can only vote once (server-based logic)
Save and reload votes on server restart
Customize it to work with any outfit, mesh, or UI
Here's a quick peek:
Players click 👍 or 👎
Their vote is saved
Can’t vote twice (no cheating!)
Seamlessly integrates into your game world
Until next time, happy pixeling!


Share this post