


Alright folks, strap in. Today I’m diving into the magical world of converting your insane, million-poly ZBrush mesh - yeah, that beast you sculpted with every pixel - to a neat little low-poly avatar you can actually use in Roblox, Unreal Engine, Unity, or Meta Horizon.
Spoiler: It’s easier than you think. No more painful manual retopology, no more banging your head against the wall.
The Problem with High-Poly Meshes
Let’s get real. Your high-res sculpt is beautiful - like a masterpiece - but it’s a 1-million-polygon monstrosity that’ll crash Roblox Studio faster than your grandma trying to use TikTok. What you need is a clean, lean low-poly version that actually runs on hardware that’s not NASA-grade.
Enter: ZBrush + ZRemesher
Step one: Duplicate your mesh in ZBrush. Don’t work on the original - you’re not a savage.

Step two: Hit up the ZRemesher tool. Target something like 1K polygons. Yes, 1,000 polygons - not 1,000,000. Click “Adapt,” “Detect Edges,” and then smash that button. Depending on your PC’s IQ, it takes a bit to churn out your new baby.
Step three: Bam. Check the mesh with Shift+F and marvel at your low-res masterpiece. It’s like magic, but better, because it actually exists.
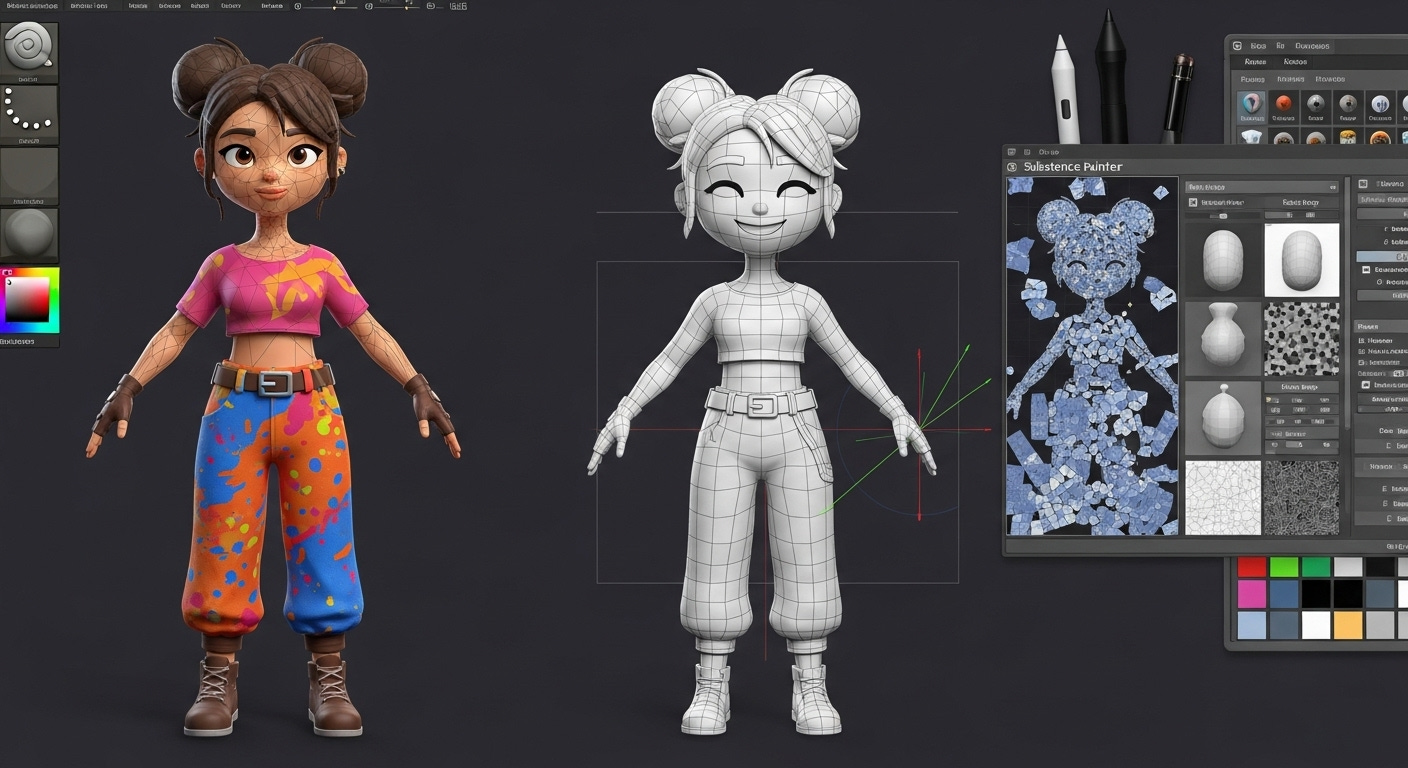
UV Unwrapping: Where the Real Witchcraft Begins
ZBrush has this plugin called UV Master that unpacks your mesh’s UVs like a pro. Click “Unwrap,” admire the quick work, then hit “Flatten” to see the layout. It’s not perfect, but it’s damn good and good enough for Roblox or Unreal low-poly avatars.
Here’s the kicker: If you’re a Blender fan who thinks ZBrush is some alien sorcery, fear not. Blender’s got its own remeshing tools, some even made by the same brainiac behind ZRemesher. They’re not free, but hey, what’s life without a little wallet pain?
Fixing Mesh Issues Like a Pro
Sometimes the auto-remesh leaves a “belly button” problem area - mesh geometry that looks like it got punched in the gut. You can manually smooth it out in ZBrush, deactivate symmetry, tweak vertex points, or use the CodeLler tool to delete and fix weird faces.
Don’t obsess over every vertex. If you can’t see it in the final product, you’re wasting your time and mental health.
Exporting Low Poly and High Poly Meshes for Baking
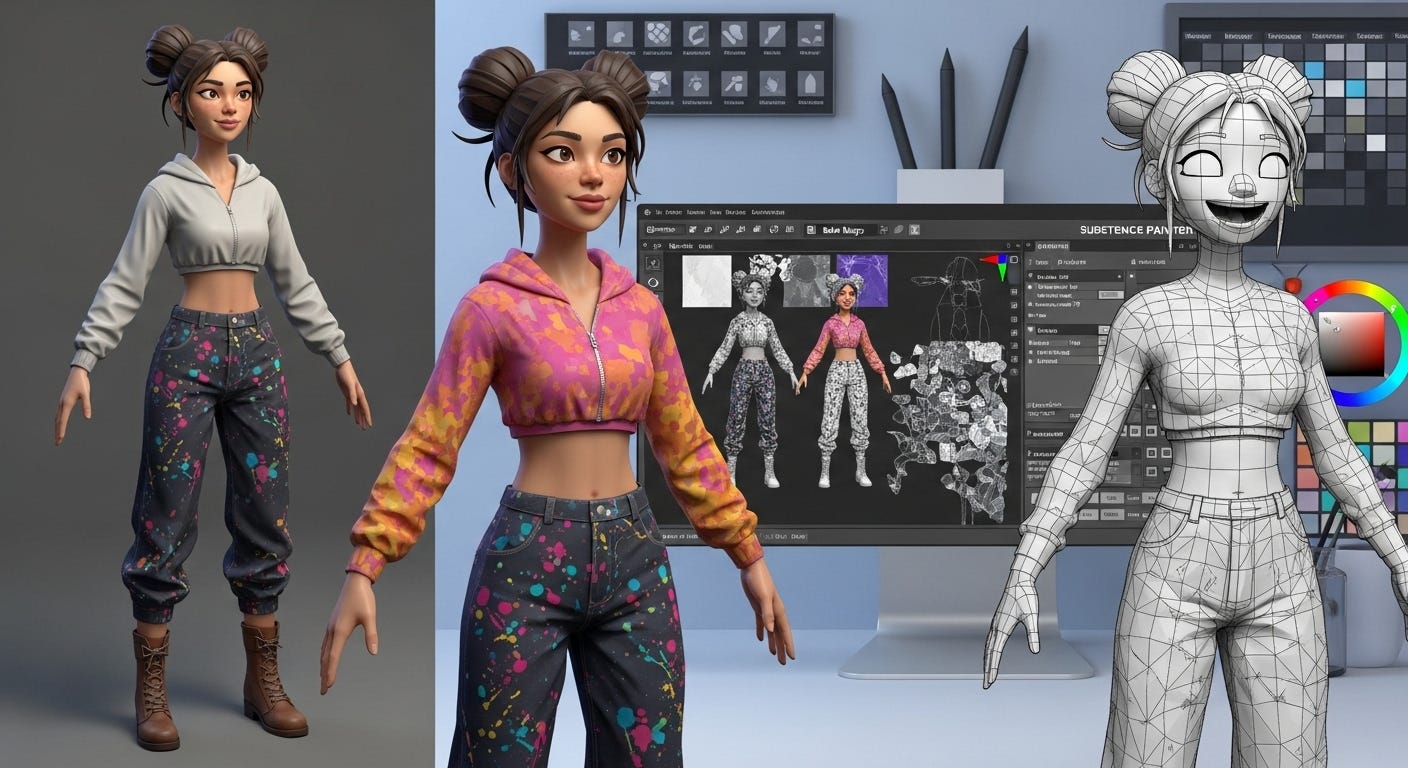
Export your low-poly mesh with smooth normals on, then export your original high-poly mesh. Both will be your dynamic duo in Substance Painter for baking all those juicy details onto your game-ready avatar.
Baking: The Ultimate Quality Check
Load your low-poly mesh into Substance Painter first. Bake a quick 2K resolution map to catch any glaring UV or geometry issues early. If you see red poking through the bake, that’s an alarm bell. Fix it or go home.
Next, bake at 4K resolution for those beautiful AO and curvature maps that make your avatar pop like it’s wearing an HDR filter on steroids.
Final Thoughts: Why Bother?
Because manual retopology is very time consuming. This process saves hours, looks good, and you end up with a character that runs smoothly on pretty much any platform. Whether you’re making Roblox avatars, Unreal meta-humans, or VR Quest monstrosities, this workflow has your back.
So, if you want to make your avatars look sharp without losing your sanity, this is your blueprint. And hey, if you want me to nerd out on Blender unwrapping or texture layering next time, hit me up.
Have questions? Want more brutal honesty about 3D workflows? Drop a comment. Until next time, stay pixelated and stay sane.


Share this post