

So, you’ve sculpted your glorious high-res character. It’s beautiful. Every crease, every fold - perfection. But there’s one problem: You need to get that masterpiece into a game engine like Roblox, and let’s face it, Roblox Studio doesn’t care about your 12-million-polygon ego.
Jump into my Roblox Experience:
YodelWood - Home of a Super Super Happy Face
What it needs is a low-res mesh and some baked magic to make it look like high-res - without turning into a slideshow. And that’s where Substance Painter comes in.
Let me walk you through the process - not as a sterile tutorial with numbered steps and corporate cheer, but as a creator who’s been in the trenches.
Baking Your Mesh Maps (The Quick & Dirty Way)
Start by loading your low-res mesh into Substance Painter.
Then, jump straight to Bake Mesh Maps. That’s where you point to your high-res mesh - the one you spent way too long sculpting - and let Substance extract all the juicy detail: normals, ambient occlusion, curvature, and so on.
Do yourself a favor: bake in 4K. You’ll thank yourself later when your textures don’t look like Minecraft leftovers.
And no, these aren't the textures you’ll see on your model - they’re the maps that drive everything else. Think of them as the underlying skeleton for the visual polish you’re about to apply.
Click Bake. Boom. Done.
Painting with Smart Materials (AKA Cheating Beautifully)
Once your maps are baked, jump back into painting mode.
This is where Substance starts to shine - or rather, make your mesh shine - literally.
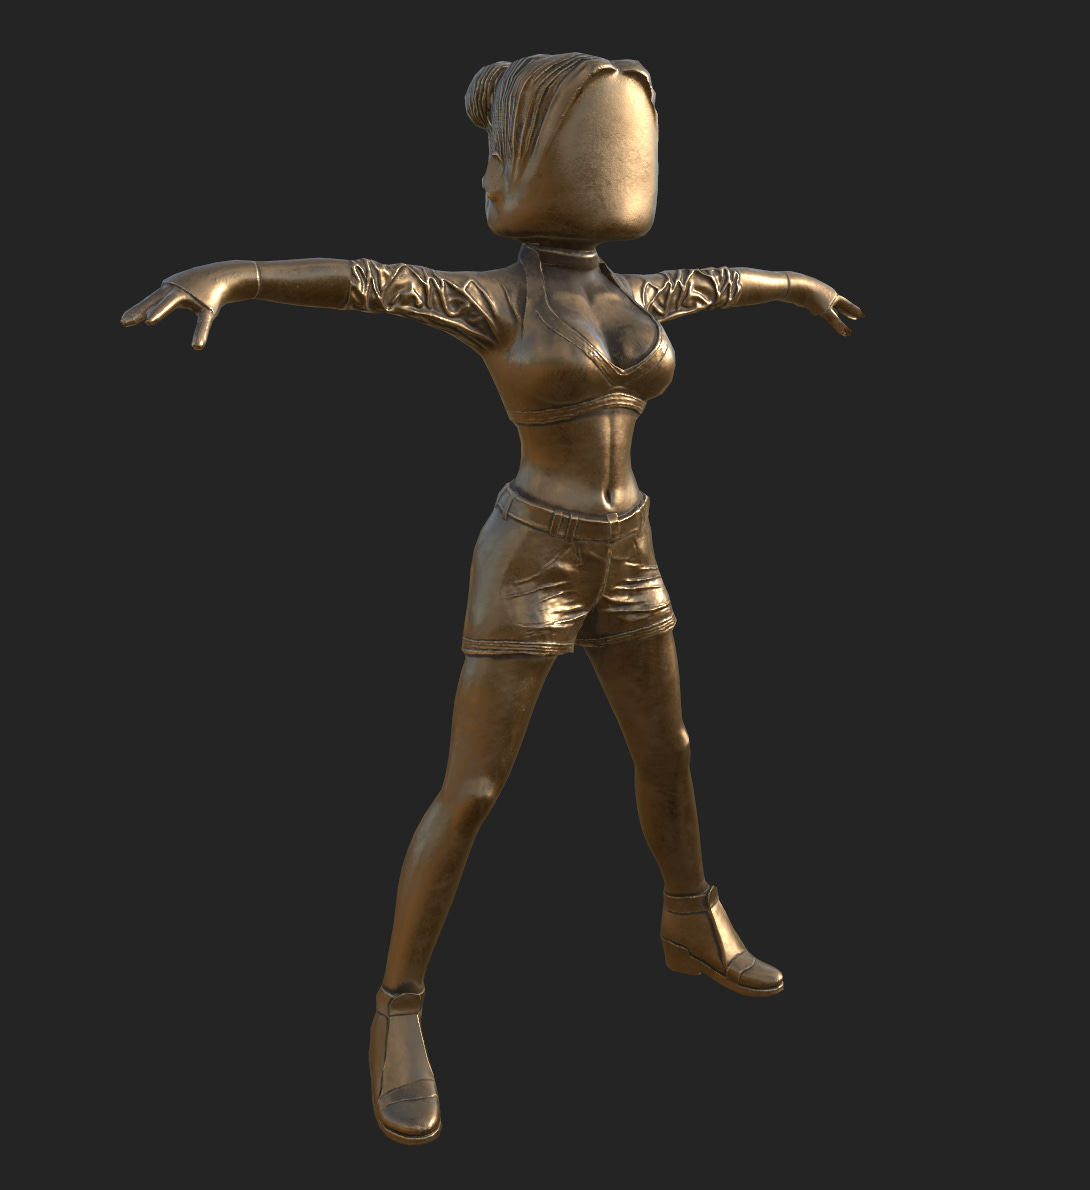
Pick a smart material from the shelf. Doesn’t matter if it’s bronze, leather, camo, or alien exoskeleton - just grab one and throw it on.
These materials come stacked with layers already - base color, roughness, metallic, and more. You don’t have to build them from scratch. Think of them as prefab looks, ready to be customized.
Want your belt to look like vintage leather? Drop a black mask on the material layer and start painting only the belt. Flip on symmetry to save yourself half the work - the other side gets mirrored as you go.
Freehand Magic - Break the Rules, Get Creative
Now, let’s say you don’t want a prepackaged look. You want something that screams you.
Add a regular paint layer. Pick a color. A stupidly bright one if that’s your vibe.
Use broad strokes. Throw some chaos on the pants. Maybe stripes. Maybe blood stains.
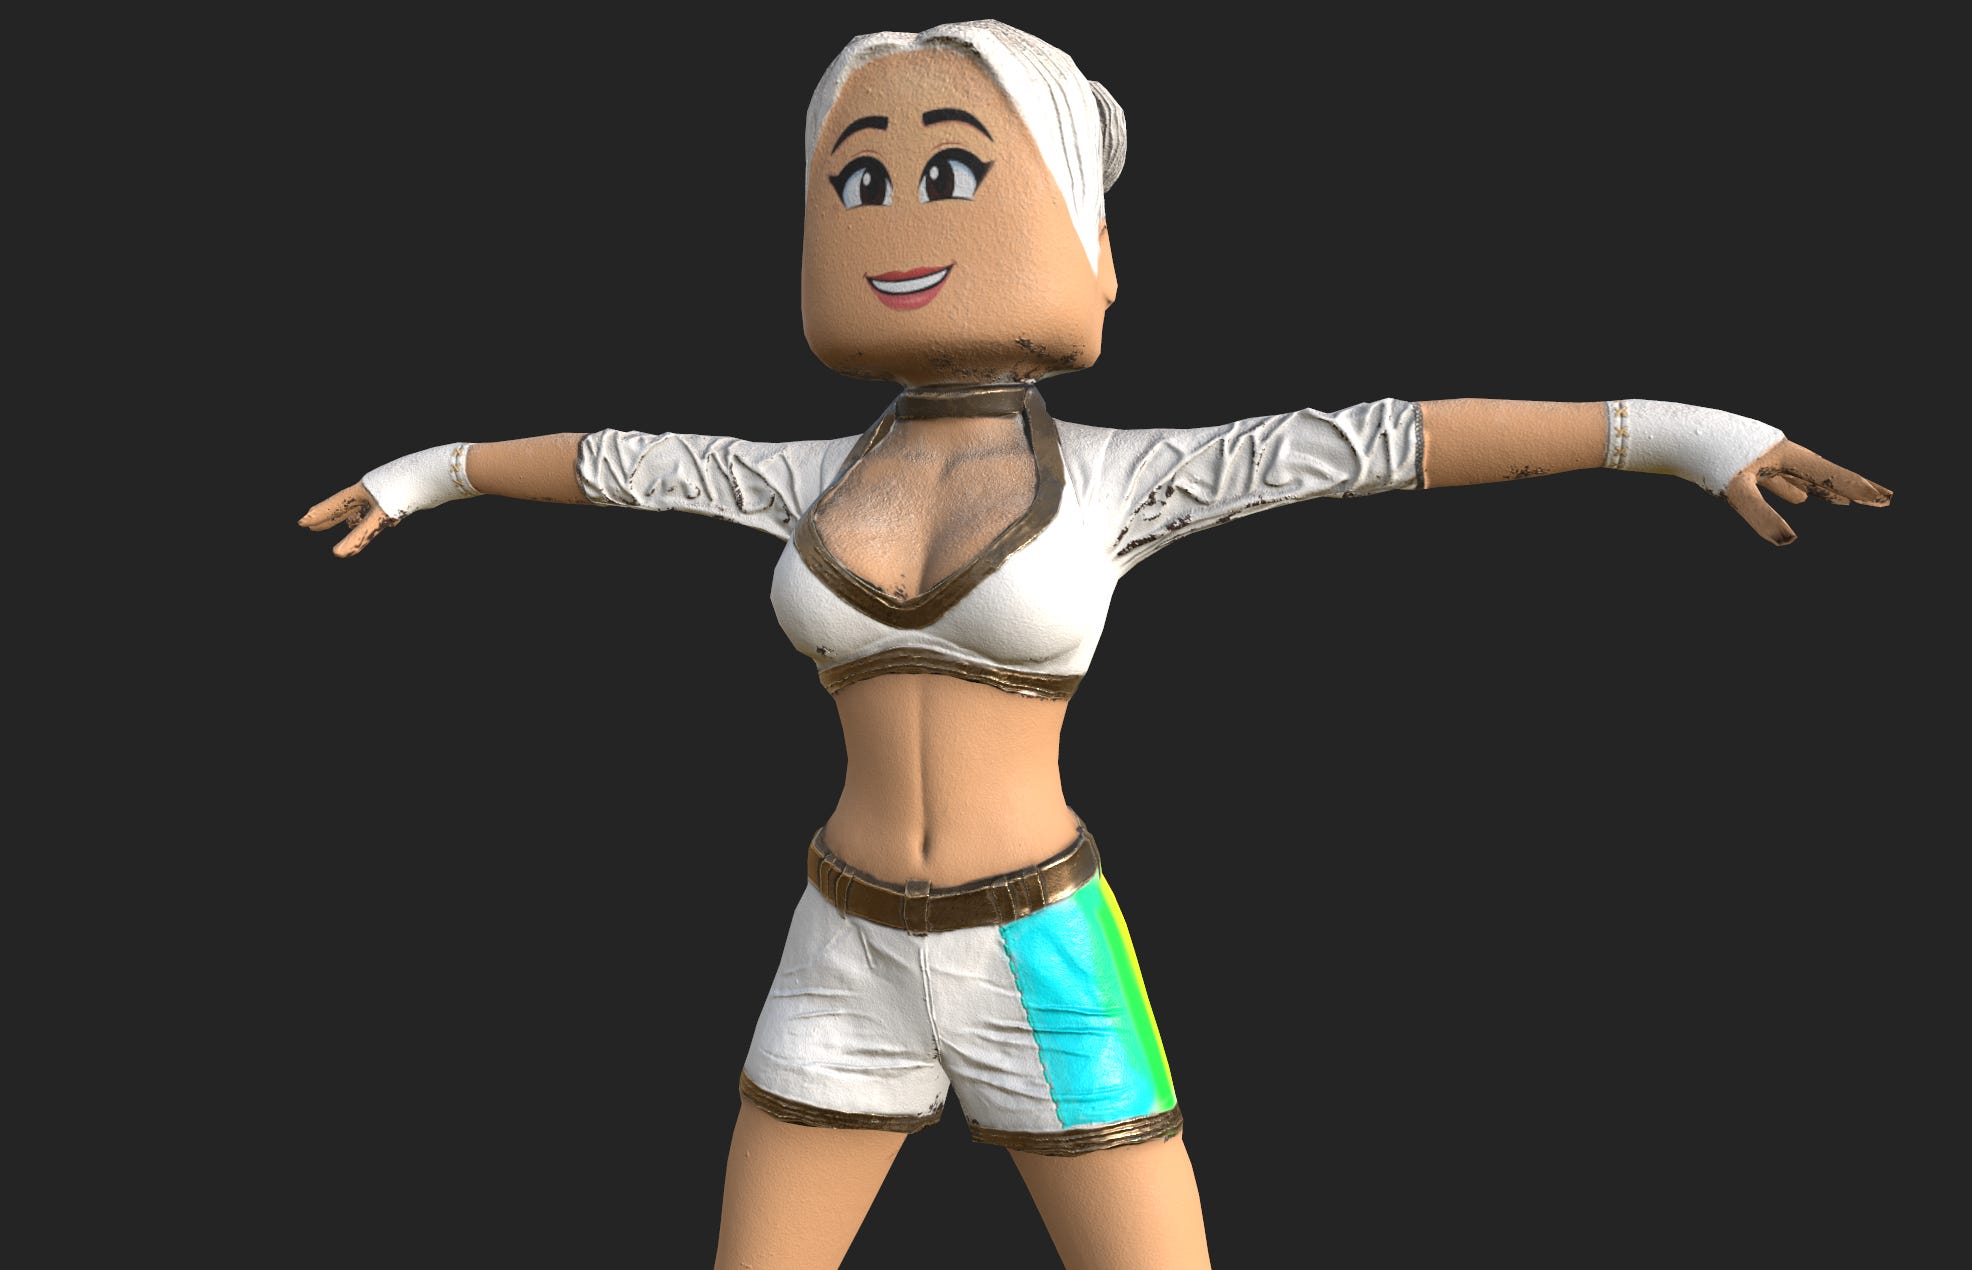
You don’t have to stay within the lines. That’s what masks are for.
Sloppy is the new sexy.
This part isn’t about precision. It’s about vibe. You’re building the soul of your character, not a product brochure.
Stitch It Up - Adding Details Without Modeling Them
You want seams? Cool. Grab a stitch brush, pick a color, and start painting fake stitches wherever you want them.
On the pants, on the jacket, on the character’s goddamn forehead if that’s your thing.
New layer. Brush. Boom - faux-seams with zero topology tweaks.
Just remember to match the normal map if you want those stitches to have depth. And make sure the brushes don’t override your masks unless you mean to.
Tattoos, Stickers & Graphics - Let’s Project Some Flavor
This is where it gets fun.
Import a custom image - a tattoo, a sticker, a cursed skull graphic you downloaded at 3am. Set it as a texture resource, then use projection mode to slap it on the model. Rotate, scale, reposition. You want it on the shoulder? The thigh? The left butt cheek? You do you.
Use a black mask again. Paint only the area where you want the graphic to appear. Use a dirt brush if you want it to look worn and weathered.
It doesn’t need to be clean. Clean is boring.
Matching Skin Tones - Because Mismatched Heads Look Weird
If you’re projecting something onto skin (like a face), you’ll probably notice a mismatch between the base skin tone and the texture map.
No big deal. Go to the skin layer and tweak the base color - match brightness, saturation, whatever’s needed.
Blend it in with a mask. Smooth the edges. This is where you fake continuity. No one will know.
Exporting for Roblox - Keep It Simple
When you’re happy with the look, head to File → Export Textures.
Use the Roblox Surface Appearance preset.
Export in JPEG 2K unless you’re a PNG fundamentalist. Honestly, the difference is barely noticeable and JPEG keeps things light.
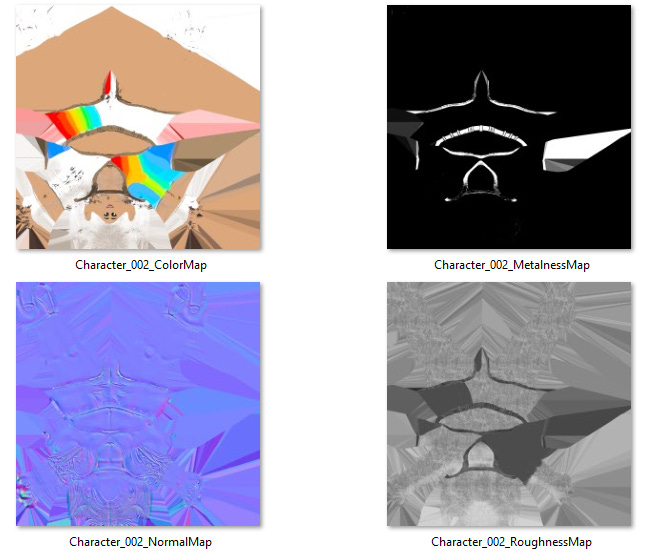
Once exported, you’ll have your texture maps ready - normal, base color, roughness, metallic - whatever you used.
These go straight into Roblox Studio. That part comes next.
Final Words: Substance Painter Is Your Playground
This whole thing? It’s not about technical perfection. It’s about speed, creativity, and getting results that look like you spent hours - when in reality, you knocked it out in one coffee-fueled sprint.
Play with layers. Break symmetry. Make ugly things beautiful and beautiful things weird.
And don’t overthink it. Paint like a rebel. Export like a pro.
Next time, I’ll show you how to bring this textured beauty into Roblox Studio and actually make it work inside the game. That’s where the magic becomes real.
Leave a comment if you’ve got questions, ideas, or if this tutorial saved you from punching your monitor. I get it.

